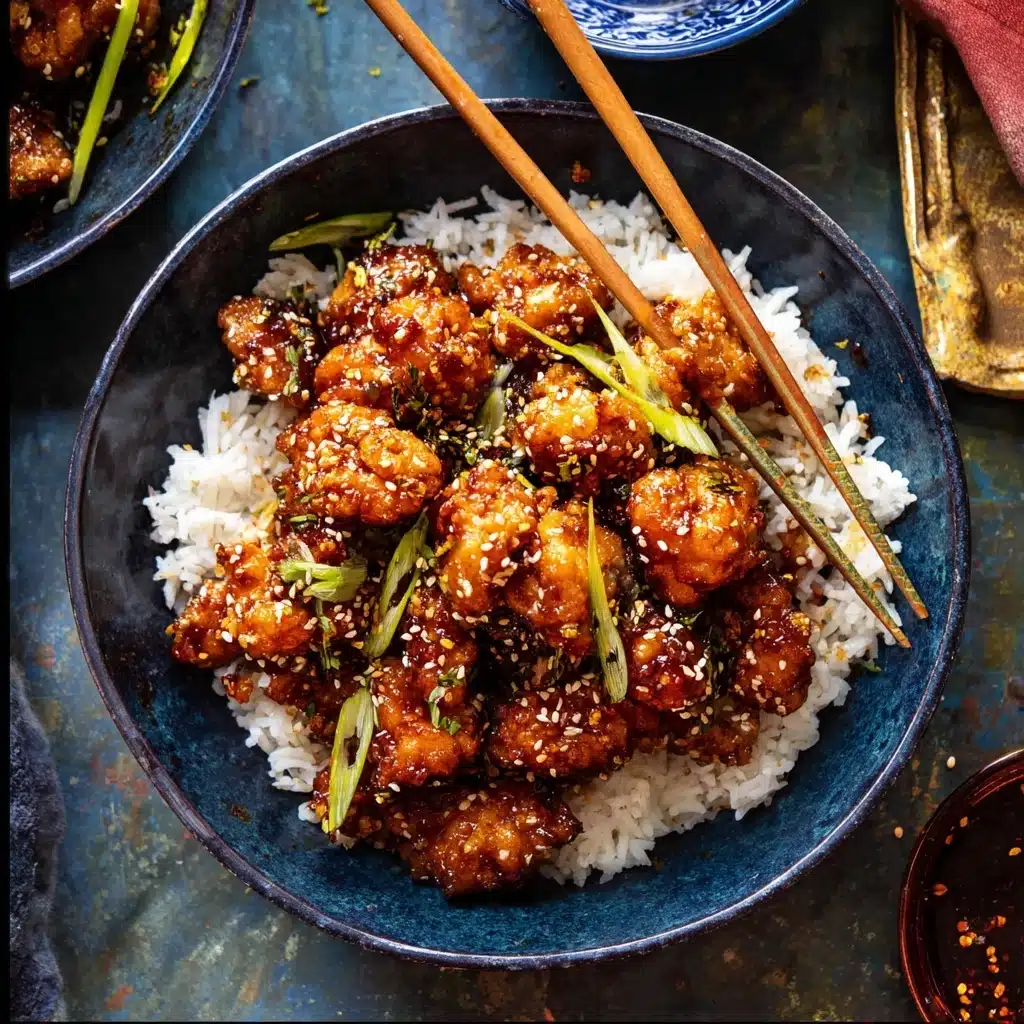
If you’re on the hunt for a lightning-fast, flavor-packed dinner that tastes like it took way more effort than it really did, you’re going to fall head-over-heels for this 20 Minute Honey Garlic Chicken. Tender bites of chicken, roasted veggies, and a sticky-sweet honey garlic sauce come together with an irresistible zing—all in half an hour flat! This recipe nails the sweet-savory balance and will have everyone racing to the table. Let’s dive into how this goes from pantry staples to dinner superstar in record time.
Ingredients You’ll Need
A short ingredient list is always a win, but each item here punches above its weight for taste and texture. Every component brings color, richness, or crunch to your 20 Minute Honey Garlic Chicken, making the finished dish shine with so little fuss!
- Chicken breasts or thighs: Boneless, skinless pieces offer juicy bites and soak up the sauce perfectly—either works, so pick your favorite.
- Garlic powder: Adds savory depth to the chicken right from the start.
- Black pepper & chili flakes: Sprinkle in a touch of heat that complements the sweet honey sauce beautifully.
- Flour or gluten-free flour: Helps the chicken get that irresistible brown crust in the oven.
- Extra virgin olive oil: Keeps both chicken and veggies moist and adds a luscious finish.
- Broccoli florets or chopped asparagus: Choose either for crispy, roasted veggies that soak up all the saucy goodness.
- Sesame seeds (for serving): Just a sprinkle adds nuttiness and a professional finish.
- Tamari or soy sauce: The umami backbone of the honey garlic sauce—tamari keeps it gluten-free if you need!
- Lemon juice: Brightens the flavor and balances the honey’s sweetness.
- Honey: The star sweetener that caramelizes in the oven for those sticky, glossy results.
- Fresh garlic (grated): Loads the sauce with punchy aroma and bite.
- Chili paste (gochujang): Adds gentle heat and a pop of color—use more or less to taste.
- Green onion (for sauce and serving): Fresh, crunchy, and bright as a garnish and inside the sauce.
- Toasted sesame oil: A final nutty note that gives the sauce true depth and a glossy sheen.
How to Make 20 Minute Honey Garlic Chicken
Step 1: Prep Your Pan and Crank the Oven
Kick things off by getting that oven humming at 450° F—yes, super hot! Line a baking sheet with parchment or slick it with olive oil, so nothing sticks and cleanup is a breeze. This high heat is one secret to making 20 Minute Honey Garlic Chicken so fast and giving the chicken that crave-worthy golden exterior in just minutes.
Step 2: Season and Coat the Chicken
Spread your cubed chicken across the sheet pan, then shower it with garlic powder, black pepper, and chili flakes. Toss the chicken in flour or gluten-free flour, which creates the beginnings of that irresistibly crisp coating. Drizzle on olive oil and mix well so every nugget is beautifully seasoned. On the other half of the pan, pile your broccoli florets or asparagus, drizzle with olive oil, and sprinkle with salt and pepper for veggies that roast up perfectly alongside the main event.
Step 3: Roast Until Bubbling and Golden
Slide the pan into the hot oven and bake for 10-15 minutes. The chicken will quickly turn golden, crispy, and juicy while the veggies take on a lovely roasted flavor. It’s all about high heat and short cook time to keep everything tender, not dry.
Step 4: Make the Honey Garlic Sauce
While the oven does its work, whisk up the iconic honey garlic sauce. Mix tamari or soy sauce, fresh lemon juice, honey, grated garlic, gochujang (for that sweet-and-spicy depth), green onions, and a drizzle of toasted sesame oil. Taste and tweak—add a dash more honey for extra sweetness or more gochujang if you’re craving extra kick!
Step 5: Saucy Finish and Final Roast
Take out the pan, remove the veggies to prevent overcooking, and pour the dreamy honey garlic sauce all over the chicken. Toss well to coat, then return the chicken to the oven for another 5 minutes. The sauce bakes in, turning sticky and glossy—every bite becomes glazed to perfection.
Step 6: Serve and Garnish
Pile up your gorgeous chicken and veggies, spoon over every last drop of sauce, and finish with chopped green onions and a shower of sesame seeds. That’s it—your 20 Minute Honey Garlic Chicken is ready to dazzle!
How to Serve 20 Minute Honey Garlic Chicken
Garnishes
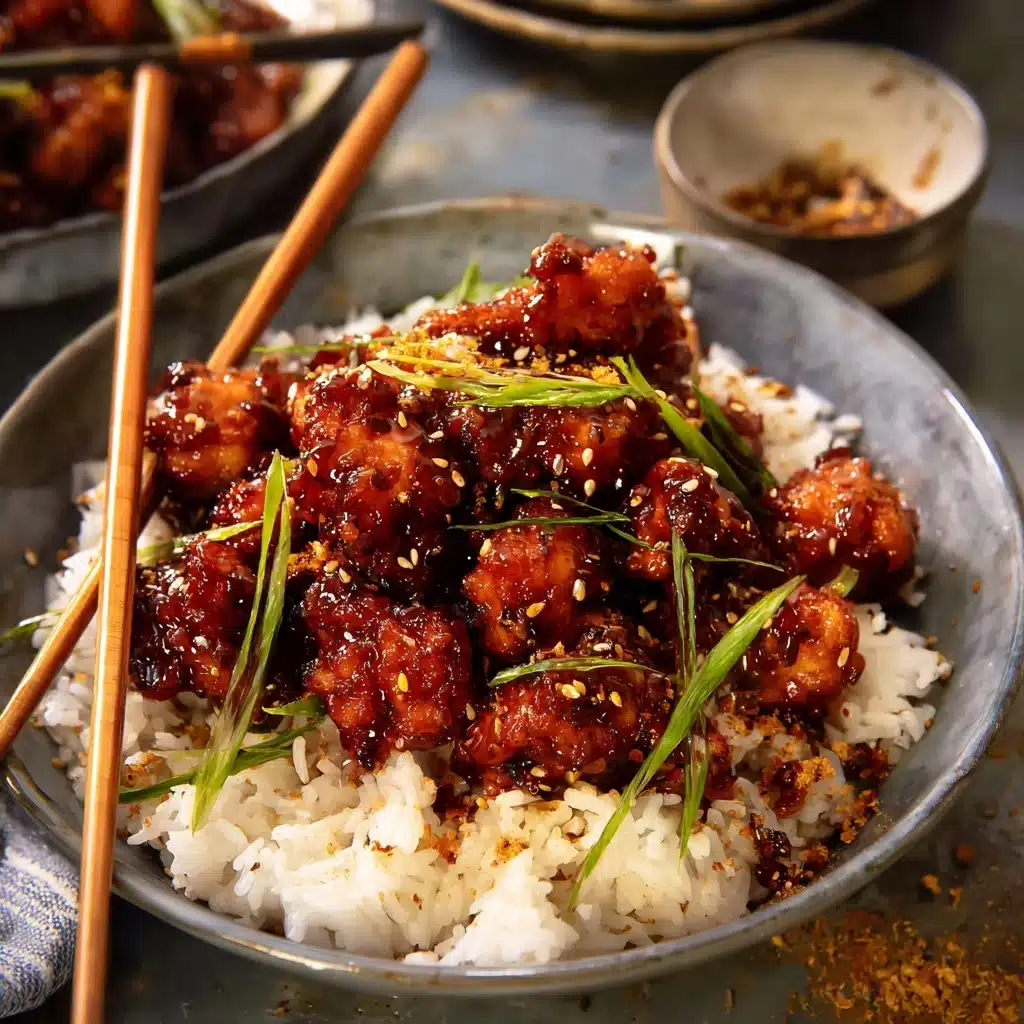
Don’t skip the final touches! A scattering of green onions provides crunch and color, while sesame seeds bring a nutty crunch that makes the dish look and taste restaurant-quality. You could even add a hint of fresh cilantro or a wedge of lemon for extra zip.
Side Dishes
This 20 Minute Honey Garlic Chicken is practically begging to be served over a bed of fluffy white or brown rice—it soaks up that luscious sauce beautifully. Want a lower-carb option? Go for cauliflower rice or toss with warm rice noodles. For a heartier meal, add extra roasted veggies or a crunchy Asian slaw on the side.
Creative Ways to Present
Switch things up and serve the chicken as an appetizer on skewers for your next party, or make lettuce wraps for a fun, handheld dinner. You can even pile it over greens for a quick, bold-flavored salad. However you serve it, this 20 Minute Honey Garlic Chicken always brings a wow factor!
Make Ahead and Storage
Storing Leftovers
Leftover 20 Minute Honey Garlic Chicken is perfect for next-day lunches or busy weeknights. Transfer cooled chicken and veggies to an airtight container and keep in the fridge for up to 3-4 days. The sauce will thicken up slightly but will bloom back to life when reheated.
Freezing
For longer storage, freeze portions of the cooked chicken and veggies in freezer-safe bags or containers. Make sure to spread them out so they freeze quickly and don’t stick together. Defrost overnight in the fridge before reheating for the best texture and flavor.
Reheating
Gently reheat your 20 Minute Honey Garlic Chicken in a skillet over medium heat or in the microwave, adding a splash of water if the sauce seems too thick. Stirring occasionally helps distribute the heat and keeps the chicken juicy—not rubbery.
FAQs
Can I use chicken thighs instead of breasts?
Absolutely! Chicken thighs actually stay even juicier and offer a richer flavor, so whether you prefer thighs or breasts, both are delicious in this 20 Minute Honey Garlic Chicken. Just keep the pieces uniform in size for even cooking.
Is there a substitute for gochujang if I can’t find it?
If gochujang is tricky to track down, you can use any chili paste you like, such as sambal oelek or even a squirt of sriracha for heat. Adjust the amount depending on your spice preference to keep that signature sweet-spicy tang.
Can I make this dish gluten-free?
Definitely! Just swap out the flour for a gluten-free blend and use tamari instead of regular soy sauce. The rest of the recipe for 20 Minute Honey Garlic Chicken is naturally gluten-free, making it easy and safe for everyone at the table.
What other vegetables can I roast with the chicken?
The beauty of this recipe is its flexibility. Try swapping the broccoli or asparagus for snap peas, bell peppers, green beans, or even chunks of zucchini. Adjust the roasting times if your veggies are softer or firmer, but just about anything works!
How do I keep the chicken from drying out?
Be sure to cut your chicken into evenly sized pieces for quick, uniform cooking, and don’t overbake. That blast of high heat is key—it cooks the chicken through fast but keeps it wonderfully tender. Try to avoid opening the oven door too much to keep the heat consistent.
Final Thoughts
If you’re craving a speedy, memorable meal with serious flavor and personality, 20 Minute Honey Garlic Chicken is the answer. Give it a try, play around with the garnishes and sides, and savor how simple, wholesome ingredients can create something absolutely crave-worthy. Dinner will never be boring again!
Print
20 Minute Honey Garlic Chicken Recipe
- Total Time: 30 minutes
- Yield: 4 servings
- Diet: Gluten Free
Description
This 20 Minute Honey Garlic Chicken is a quick and flavorful dish that combines tender chicken with a sweet and savory honey garlic sauce. Perfect for a busy weeknight dinner!
Ingredients
Chicken:
- 2 pounds chicken breasts or thighs, cut into cubes
- 1 tablespoon garlic powder
- Black pepper and chile flakes
- 1/4 cup flour or gluten-free flour
- 4 tablespoons extra virgin olive oil
Honey Garlic Sauce:
- 1/3 cup tamari or soy sauce
- 2 tablespoons lemon juice
- 3 tablespoons honey
- 6 cloves garlic, grated
- 3–4 tablespoons chili paste (gochujang)
- 2 tablespoons chopped green onion
- 1 tablespoon toasted sesame oil
Instructions
- Preheat the oven: Preheat the oven to 450°F and prepare a baking sheet.
- Prepare chicken and vegetables: Toss chicken with seasonings, flour, and olive oil. Arrange on one side of the baking sheet. Toss broccoli/asparagus with oil, salt, and pepper, and place on the other side of the sheet. Bake for 10-15 minutes.
- Make the sauce: Combine all sauce ingredients in a bowl or jar.
- Coat chicken with sauce: Remove vegetables, pour sauce over chicken, toss to coat, and bake for an additional 5 minutes.
- Serve: Garnish with green onions and sesame seeds. Enjoy over rice or as an appetizer!
- Prep Time: 10 minutes
- Cook Time: 20 minutes
- Category: Main Dish
- Method: Baking
- Cuisine: Asian
Nutrition
- Serving Size: 1 serving
- Calories: 585 kcal
- Sugar: 14g
- Sodium: 1233mg
- Fat: 24g
- Saturated Fat: 5g
- Unsaturated Fat: 15g
- Trans Fat: 0g
- Carbohydrates: 32g
- Fiber: 3g
- Protein: 58g
- Cholesterol: 181mg


