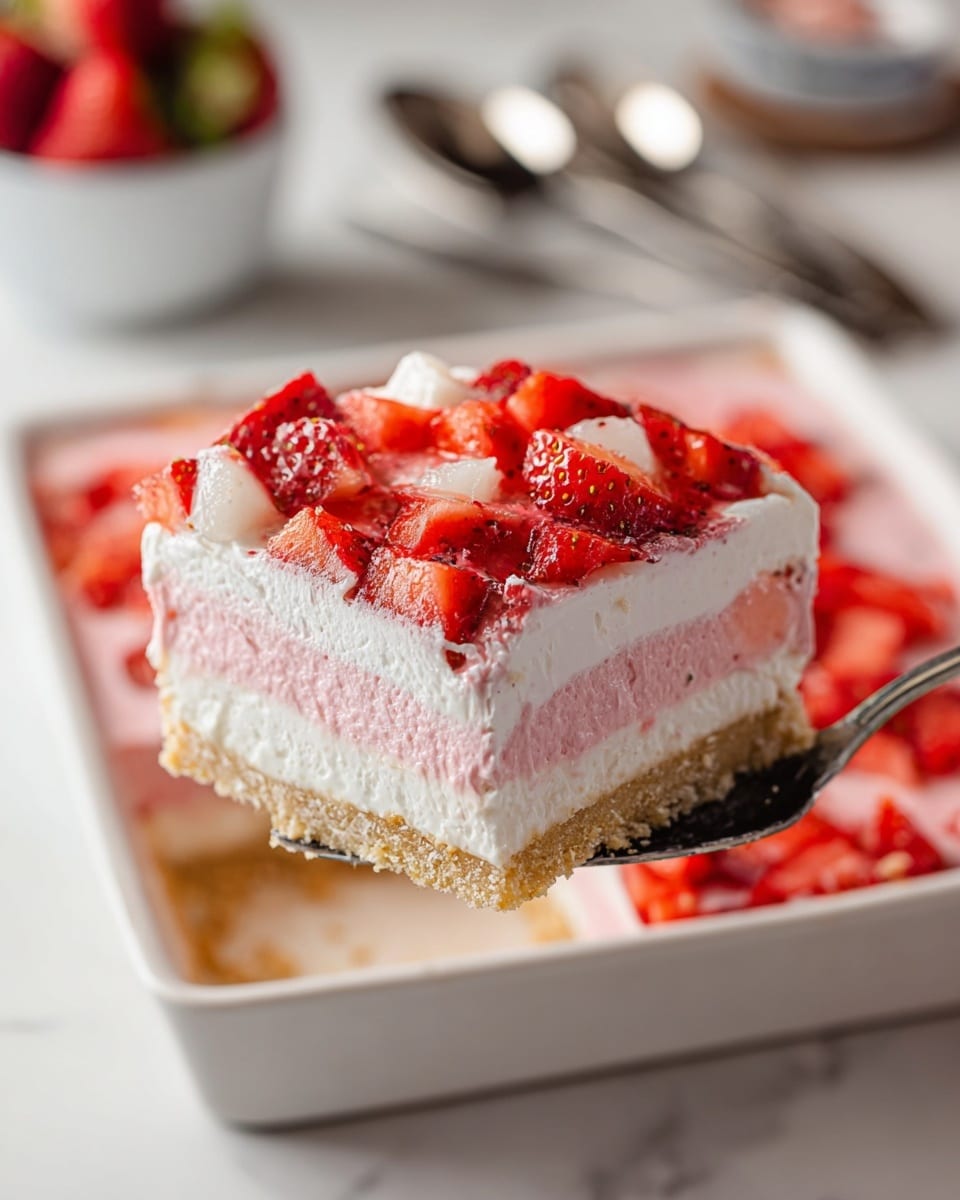
If you’re craving a dessert that’s irresistibly creamy, fruity, and downright dreamy, then you simply must try this Strawberry Lush Recipe. It’s a luscious, layered treat featuring a buttery golden Oreo crust, a velvety cheesecake filling, a sweet strawberry gelatin layer, and a fluffy whipped topping crowned with juicy fresh strawberries. Every spoonful bursts with flavor and texture, making it a perfect showstopper for gatherings or a special everyday indulgence. Once you try this Strawberry Lush Recipe, it might just become your new favorite go-to dessert.
Ingredients You’ll Need
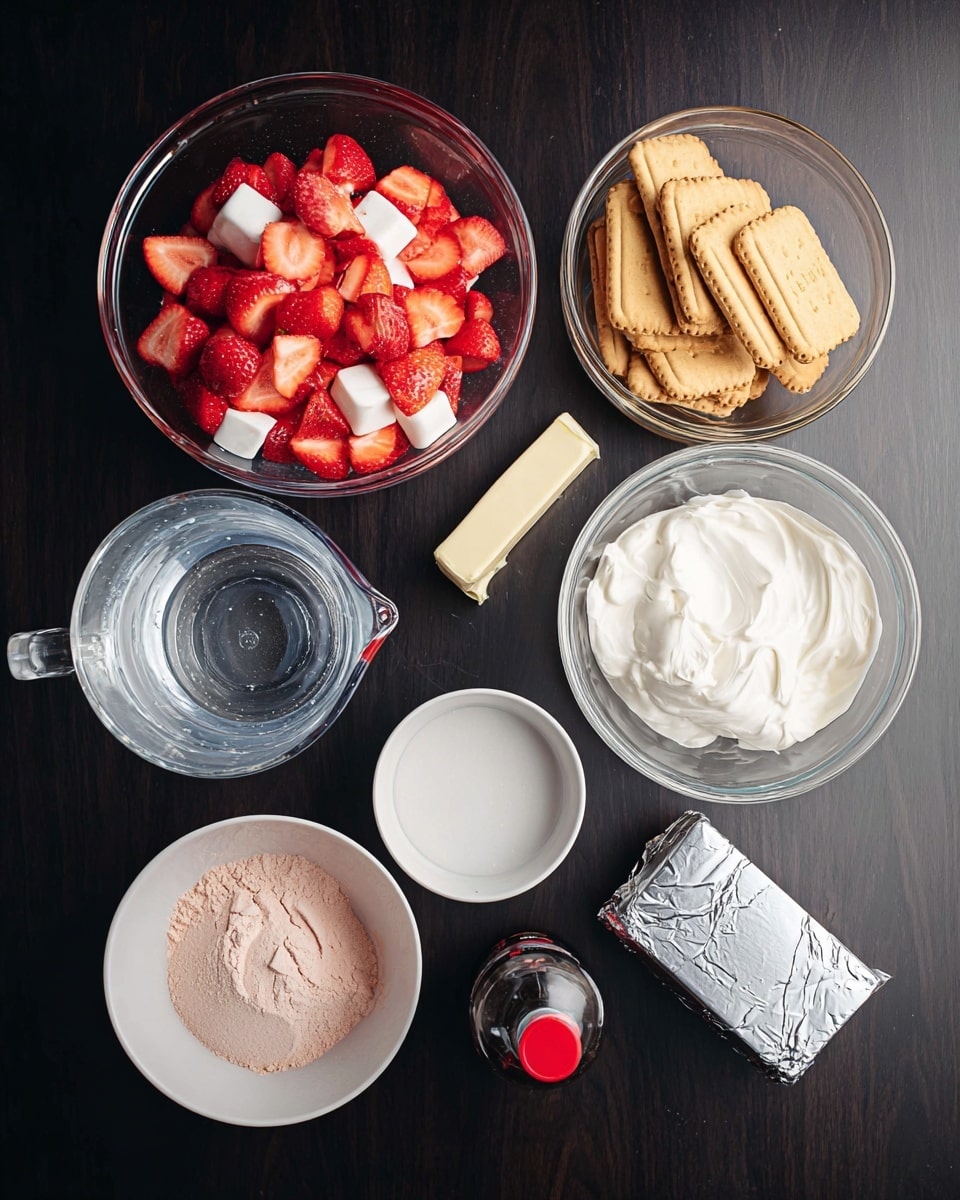
This recipe shines because of its simple yet perfectly balanced ingredients. Each one offers something special, whether it’s the crisp, buttery base or the light, fruity layers that follow, creating a dessert that’s as beautiful to look at as it is delicious.
- 24 Golden Oreos: These buttery cookies form the crispy, sweet crust foundation for the dish.
- 5 Tablespoons butter: Adds richness and helps bind the crust together for that perfect texture.
- Butter or shortening (for greasing): Prevents the dessert from sticking and makes serving a breeze.
- 1 Box strawberry gelatin (3-Ounce): Infuses the dessert with bright, fruity flavor and helps create the signature layered look.
- ¾ Cup boiling water: Used to dissolve the gelatin fully, ensuring smooth layers.
- ½ Cup ice-cold water: Helps firm up the gelatin mixture gently.
- 16 Ounces cream cheese (room temperature): Provides a creamy, slightly tangy cheesecake layer, balancing sweetness perfectly.
- 1 Cup powdered sugar: Sweetens the cheesecake filling without graininess.
- 1 Teaspoon vanilla extract: Adds warm, fragrant depth to the cheesecake layer.
- 24 Ounces whipped topping (thawed): Lightens the textures and helps create those fluffy, dreamy layers.
- 16 Ounces fresh strawberries (diced): Fresh fruit on top for brightness, sweetness, and an inviting pop of color.
How to Make Strawberry Lush Recipe
Step 1: Prepare Your Pan
Start by greasing the bottom of a 9 x 13-inch baking dish with butter or shortening. This simple step ensures your dessert won’t stick and will come out cleanly when it’s time to slice and serve. It’s a small but essential detail that makes all the difference in presentation.
Step 2: Make the Golden Oreo Crust
Grab your food processor and crush the 24 Golden Oreos at high speed until they’re fine crumbs. As the processor runs at low speed, slowly add the melted butter. Watch as the crumbs start to come together—this means the crust is ready for pressing. Pour the mixture into your greased pan and firmly press it down into an even layer. Then, pop it into the freezer for at least 20 minutes to set. This crust is buttery and crisp, perfectly complementing the creamy layers coming next.
Step 3: Whisk Together the Strawberry Gelatin Layer
While the crust chills, it’s time for that vibrant strawberry gelatin layer. In a large bowl, whisk together the strawberry gelatin powder and ¾ cup boiling water until completely dissolved. Next, pour in ½ cup of ice-cold water slowly while continuing to whisk, creating a smooth and balanced mixture. Gently fold in one-third of the thawed whipped topping—this lightens the gelatin without deflating it. Set this mixture aside in the fridge while you whip up your cheesecake filling.
Step 4: Create the Cheesecake Filling
In a separate bowl, blend the room-temperature cream cheese with powdered sugar and vanilla extract using an electric mixer until silky smooth. Then, carefully mix in another third of the whipped topping on low speed, just until everything is combined. This cheesecake layer is rich and creamy but still light enough to balance the overall dessert beautifully.
Step 5: Assemble the Layers
Spoon the cheesecake filling evenly over the frozen Oreo crust and smooth it out gently. Take the gelatin mixture from the fridge, give it a quick stir to keep everything well combined, then pour it over the cheesecake layer. This colorful, fruity top will soon set into place, completing the dessert’s signature look.
Step 6: Chill and Finalize
Cover your dessert with plastic wrap and refrigerate it for at least 4 hours—or until the gelatin layer is fully set. The wait is worth it because this chilling step allows all the layers to meld into an irresistible treat. Just before serving, spread the remaining whipped topping on top, smoothing it out nicely. To finish off, sprinkle diced fresh strawberries across the top for a fresh, juicy burst that adds brightness with every bite.
How to Serve Strawberry Lush Recipe
Garnishes
To make your Strawberry Lush Recipe truly stunning, garnish with a handful of fresh strawberry slices or whole small berries for a natural, inviting look. You can also add a few mint leaves for a touch of green that brightens the plate and complements the fruity flavors perfectly.
Side Dishes
This luscious dessert pairs wonderfully with a light cup of brewed coffee or a refreshing glass of sparkling water with lemon. For an extra indulgent meal, serve it alongside a crisp salad or light poultry dish to balance rich and fresh elements beautifully.
Creative Ways to Present
Want to impress your guests? Consider serving Strawberry Lush in individual mason jars for a charming, personalized touch. Layer presentation in clear glass dishes showcases the dessert’s vibrant colors and tempting layers. You can also experiment by adding chopped nuts or a drizzle of white chocolate on top for added texture and flair.
Make Ahead and Storage
Storing Leftovers
Leftover Strawberry Lush should be refrigerated in an airtight container to keep it fresh and prevent it from drying out. It will hold its delicious texture and flavor beautifully for up to 3 days, making it ideal for prepping ahead or enjoying over time.
Freezing
Although this dessert is best enjoyed fresh, you can freeze it if needed. Wrap it tightly with plastic wrap and then aluminum foil to prevent freezer burn. When you’re ready to eat, thaw it overnight in the refrigerator before serving to preserve the creamy, layered texture.
Reheating
This is a no-heat dessert, so reheating isn’t necessary. Serve chilled straight from the fridge for the best flavor and that perfect, refreshing creamy texture that defines the Strawberry Lush Recipe. If you prefer it less cold, simply leave it out for a few minutes before serving.
FAQs
Can I use regular Oreos instead of Golden Oreos?
Absolutely, though Golden Oreos are preferred for their buttery flavor and color that complement the strawberry layers better. Using regular Oreos will create a chocolate base, which changes the flavor profile but can still be delicious.
Is it possible to make this dessert gluten-free?
Yes! Just swap the Golden Oreos for a gluten-free cookie version and confirm that other ingredients are gluten-free certified. The rest of the recipe remains just the same and just as delightful.
Can I use homemade whipped cream instead of store-bought whipped topping?
Yes, homemade whipped cream can work beautifully. Just be sure it’s whipped to stiff peaks to hold up in the layers, and use it chilled for the best texture and taste.
How long does the Strawberry Lush Recipe need to chill?
A minimum of 4 hours is recommended to allow the gelatin layer to set fully and for the flavors to meld together. Overnight chilling often yields an even better texture and flavor experience.
Can I substitute the strawberry gelatin with another flavor?
You can experiment with other fruit-flavored gelatin powders, but keep in mind that the fresh strawberry topping complements the strawberry flavor best. Using a different flavor will alter the overall taste, which might be fun to try but changes the classic Strawberry Lush Recipe experience.
Final Thoughts
There’s something truly magical about the Strawberry Lush Recipe that makes every bite feel special. Whether you’re serving it at a family gathering or treating yourself to a sweet moment, this dessert combines ease with elegance flawlessly. I hope you enjoy making and sharing it as much as I do — it’s a guaranteed crowd-pleaser that brings smiles and happy taste buds all around!
Print
Strawberry Lush Recipe
- Total Time: 4 hours 30 minutes
- Yield: 12 servings
Description
Strawberry Lush is a no-bake layered dessert featuring a crunchy Golden Oreo crust, creamy cheesecake filling, and a vibrant strawberry gelatin topping. Topped with fresh strawberries and whipped cream, this refreshing treat is perfect for warm-weather gatherings or anytime you desire a delicious, easy-to-make dessert.
Ingredients
Crust
- 24 Golden Oreos
- 5 Tablespoons butter
- Butter or shortening (for greasing)
Gelatin Layer
- 1 Box strawberry gelatin (3-Ounce)
- ¾ Cup water (boiling)
- ½ Cup water (ice cold)
- 24 Ounces whipped topping (thawed, divided)
Cheesecake Layer
- 16 Ounces cream cheese (at room temperature)
- 1 Cup powdered sugar
- 1 Teaspoon vanilla extract
Topping
- 16 Ounces strawberries (fresh, diced)
Instructions
- Grease the Pan: Grease the bottom of a 9 x 13-inch baking dish or pan with butter or shortening to prevent sticking. Set aside.
- Make the Crust: Crush the Golden Oreos in a food processor at high speed until finely crumbled. With the processor running at low speed, slowly add the melted butter until the crumbs start to clump together.
- Press the Crust: Pour the Oreo crumb mixture into the greased pan and press them firmly and evenly into the bottom to form a crust layer.
- Freeze the Crust: Place the pan in the freezer for at least 20 minutes or until the crust is firm and set.
- Prepare the Gelatin Mixture: In a large bowl, whisk together the strawberry gelatin powder and boiling water until fully dissolved.
- Combine with Cold Water and Whipped Topping: Slowly whisk in the ice-cold water. Then, gently fold in one third of the thawed whipped topping to avoid deflating it. Refrigerate this gelatin mixture while preparing the next layer.
- Make the Cheesecake Filling: In a separate large bowl, beat the cream cheese, powdered sugar, and vanilla extract with an electric mixer until smooth and creamy.
- Add Whipped Topping: Mix in another third of the whipped topping into the cream cheese mixture on low speed until combined.
- Assemble First Two Layers: Remove the crust from the freezer. Spoon the cheesecake filling evenly over the frozen crust and spread it out smoothly.
- Add Gelatin Layer: Take the gelatin mixture from the fridge and stir gently to ensure it hasn’t separated. Pour this mixture over the cheesecake layer evenly.
- Chill the Dessert: Cover the dessert with plastic wrap and refrigerate for at least 4 hours or until the gelatin layer is fully set.
- Finish with Toppings: Just before serving, spread the remaining third of whipped topping on top and smooth it out evenly.
- Garnish and Serve: Top the dessert with freshly diced strawberries and serve chilled for a refreshing finish.
Notes
- Ensure the cream cheese is at room temperature for a smoother filling.
- Freezing the crust before adding layers helps maintain texture.
- Use fresh strawberries for the best flavor and presentation.
- Keep the dessert refrigerated until serving to maintain the gelatin layer.
- For a firmer crust, press the crumbs tightly and chill well before assembling.
- Prep Time: 20 minutes
- Cook Time: 0 minutes
- Category: Dessert
- Method: No-Cook
- Cuisine: American

