This whole wheat bread recipe is my absolute go-to whenever I’m craving a homemade loaf that’s both nutritious and delightfully soft. The crust is golden and tender, the crumb is hearty without being dense, and the aroma as it bakes fills your kitchen with pure comfort. For best results, I recommend making two separate batches of dough, which keeps everything manageable and ensures the texture is just right every time. Whether you’re packing sandwiches or simply slathering on some butter, this loaf easily outshines anything from the store shelf!
Ingredients You’ll Need
Simple ingredients can truly work magic when it comes to homemade bread, and each one in this recipe adds something special—whether it’s flavor, tenderness, or that classic wheat color. Measure carefully, and you’ll be well on your way to the perfect loaf.
- Warm water: Activates the yeast and hydrates the flour, setting the stage for a light rise.
- Whole milk: Adds richness and softness to the crumb; use whole milk for the best texture.
- Active dry or instant yeast: Gives your bread its beautiful lift and lovely aroma—don’t skip this step!
- Whole wheat flour: The star of the show, bringing hearty flavor, fiber, and a gorgeous golden hue.
- Honey: Naturally sweetens the bread, boosts yeast activity, and keeps the loaf from drying out.
- Unsalted butter: Adds richness and a tender crumb—make sure it’s softened so it blends evenly.
- Fresh lemon juice or apple cider vinegar: Balances flavors and contributes to the bread’s structure.
- Salt: Essential for flavor and helps control the yeast so your loaf isn’t bland.
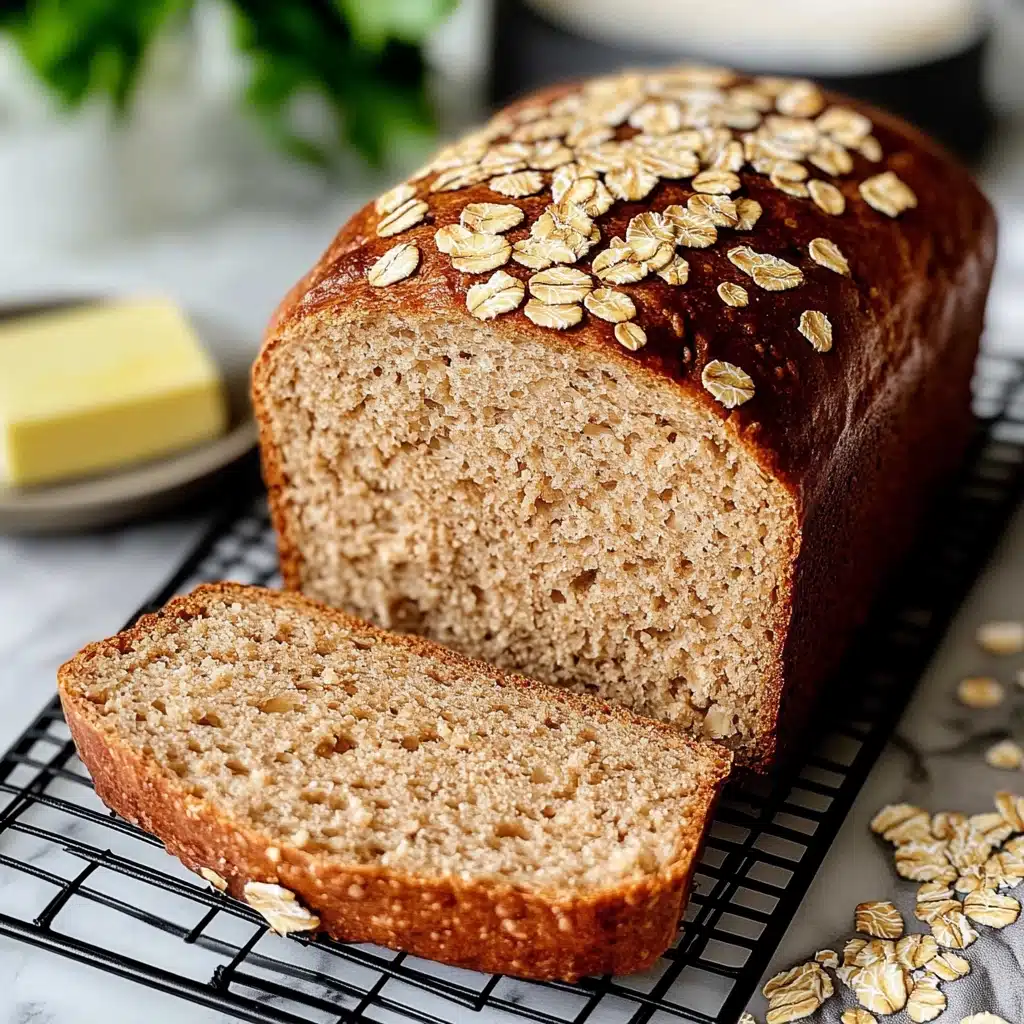
- Optional oat topping: A sprinkle of whole oats after brushing with egg white adds rustic charm and a bit of crunch!
How to Make For best results, I recommend making two separate batches of dough
Step 1: Prepare the Sponge
In a large bowl (or the bowl of your stand mixer), whisk together the warm water, whole milk, and yeast. Stir in 2 cups of the whole wheat flour until you have a thick, sticky batter. Cover the bowl lightly and let the mixture rise at room temperature until doubled in size—about 60 to 90 minutes, though sometimes up to 2 hours. This step is where your bread develops depth of flavor, so don’t rush it! Remember, for best results, I recommend making two separate batches of dough if you want to double up.
Step 2: Mix in the Dough Ingredients
Add the honey, softened butter, lemon juice (or vinegar), the remaining whole wheat flour, and salt to the sponge. Using a dough hook, spatula, or a sturdy spoon, mix on medium speed (or by hand) until the dough comes together and pulls away from the sides of the bowl—about 3 minutes. If the dough feels too sticky to knead, add flour just one tablespoon at a time. Dough should be soft and just a bit tacky to the touch.
Step 3: Knead the Dough
Continue beating the dough in the mixer for 8–10 minutes, or knead by hand on a lightly floured surface for the same amount of time. This is a great kitchen workout! The dough will become smooth and elastic. Test by poking it gently; if it springs back slowly, you’ve got ready-to-rise dough. The kneading—and for best results, I recommend making two separate batches of dough especially if working in a small kitchen—ensures that every loaf has the perfect crumb.
Step 4: First Rise
Grease a large bowl lightly with oil or nonstick spray, place your dough inside, and turn it to coat. Cover and let it rise in a warm spot for 1.5–2 hours, or until doubled in size. This rise gives your bread that wonderful, airy texture that’s so satisfying in every bite.
Step 5: Shape the Loaf
Once the dough has risen, punch it down gently to release excess air. On a lightly floured surface, pat and then roll it out to an 8×15-inch rectangle. Roll it up lengthwise and place into a greased 9×5-inch loaf pan. Don’t stress over perfection—the homey, rustic look is part of this bread’s charm.
Step 6: Second Rise
Cover the shaped dough and let it rise again, this time until it’s about 1 inch above the rim of the pan (about 45–60 minutes). This final proof gives the loaf nice height and ensures a light, fluffy crumb throughout. Trust me, for best results, I recommend making two separate batches of dough if doubling—your loaves will thank you.
Step 7: Optional Oat Topping
If you love that bakery-style flair, brush the risen loaf gently with egg white and sprinkle a tablespoon of whole oats over the top. It adds just enough crunch and makes your loaf look extra inviting!
Step 8: Bake the Bread
Preheat your oven to 350°F (177°C), placing the rack in a lower position to keep the top from browning too fast. Bake for 36–40 minutes, tenting with foil halfway through if needed. The bread is done when it sounds hollow if tapped, or registers 195–200°F (90–93°C) internally. Let it cool a bit in the pan before transferring to a wire rack—resist the urge to slice immediately for best texture!
How to Serve For best results, I recommend making two separate batches of dough

Garnishes
Keep things classic with a sweep of butter or a drizzle of honey over a warm slice. For a savory twist, try a bit of flaky sea salt or a light smear of creamy ricotta. That optional oat topping brings a little extra crunch and a touch of sweetness—just enough to make every bite memorable!
Side Dishes
This bread shines alongside so many meals! Use thick slices for hearty sandwiches, serve with a bowl of soup on chilly evenings, or toast and pair with eggs at breakfast. For best results, I recommend making two separate batches of dough so you’ll have enough to share with family or friends for brunch gatherings.
Creative Ways to Present
Try slicing your loaf extra thick and grilling it for a rustic open-faced sandwich. Or cut into cubes, toss with olive oil and herbs, and bake into homemade croutons for salads and soups. For best results, I recommend making two separate batches of dough and freezing one loaf for those busy weeks—you’ll thank yourself later!
Make Ahead and Storage
Storing Leftovers
Wrap your cooled bread tightly in plastic wrap or store in an airtight container at room temperature. It’ll stay fresh and soft for up to a week. The flavor often deepens after a day or two, making every slice even more tempting for toast or sandwiches.
Freezing
To freeze, you can either freeze the shaped unbaked loaf (after the second rise but before baking) or the fully baked and cooled loaf. For best results, I recommend making two separate batches of dough when you want extra bread to stash in the freezer. Wrap well in plastic, then foil, and freeze for up to three months.
Reheating
If you’ve frozen the baked bread, let it thaw at room temperature or in the fridge, then warm individual slices in the toaster or oven. For extra moistness, brush lightly with water and place in a 350°F oven for 5–10 minutes. Fresh-baked flavors right from your freezer!
FAQs
Can I use only whole wheat flour, or should I mix in bread flour?
Absolutely! You can use 100 percent whole wheat flour for a hearty loaf, or substitute up to one cup of bread flour for a taller, lighter crumb. For best results, I recommend making two separate batches of dough if you want to experiment with the flour mix to see which version you love more.
What if I don’t have honey?
While honey gives the bread an unbeatable flavor and texture, you can substitute with granulated or brown sugar in a pinch. The loaf will still be delicious, just with a slightly different sweetness profile.
Can I make the dough ahead of time?
Yes, you can absolutely prepare the dough and pop it in the fridge overnight! Follow the “overnight” instructions so you can bake fresh bread the next day with zero morning fuss.
Why shouldn’t I double the dough in one batch?
This dough gets heavy and large when doubled, which can cause uneven mixing and rising. For best results, I recommend making two separate batches of dough—it keeps the process enjoyable and ensures both loaves turn out perfectly!
Can I shape this dough into rolls or a boule?
This particular recipe works best as a traditional loaf. The dough is too soft to hold its shape as a boule, but if you’re after wheat rolls, check out my dedicated whole wheat dinner rolls recipe for a guaranteed win!
Final Thoughts
There’s something so rewarding about baking your own whole wheat bread, and with a few simple ingredients and some patience, you’ll have a loaf that’s truly worth the effort. For best results, I recommend making two separate batches of dough if you want a backup loaf or extra to share. Enjoy every slice and don’t forget to savor that fresh-baked aroma—happy baking, friend!
Print
For best results, I recommend making two separate batches of dough Recipe
- Total Time: 5 hours, 10 minutes
- Yield: 1 loaf
- Diet: Vegetarian
Description
This homemade whole wheat bread is soft, hearty, and delightfully flavorful, using just 8 simple ingredients. Crafted with 100% whole wheat flour (or the option to swap in some bread flour for a slightly taller, fluffier loaf), this bread outshines store-bought varieties and is perfect for sandwiches or toast. With straightforward steps, including sponge and dough preparation, and flexible options for freezing or overnight rising, this recipe is ideal for bakers of all levels who want to enjoy fresh-baked, nutritious bread at home.
Ingredients
Sponge
- 1 cup (240ml) water, warmed to about 110°F (43°C)
- 1/3 cup (80ml) whole milk, warmed to about 110°F (43°C)
- 2 and 1/4 teaspoons (7g) active dry or instant yeast (1 standard packet)
- 2 cups (260g) whole wheat flour (spooned & leveled)
Dough
- 3 Tablespoons (63g) honey
- 3 Tablespoons (43g) unsalted butter, softened to room temperature
- 1 teaspoon fresh lemon juice (or apple cider vinegar)
- 1 and 1/3 cups (173g) whole wheat flour (spooned & leveled), plus more as needed
- 1 and 1/4 teaspoons salt
Optional Topping
- 1 beaten egg white
- 1 Tablespoon whole oats
Instructions
- Prepare the Sponge: In a large bowl or the bowl of your stand mixer, whisk together the warm water, warm milk, and yeast. Stir in the 2 cups (260g) whole wheat flour until a thick batter forms. Cover lightly and allow to double in size at room temperature, about 60–90 minutes (up to 2 hours if needed). Avoid using a hand mixer, as the dough will be too thick.
- Add Dough Ingredients: Add the honey, softened butter, lemon juice, additional whole wheat flour, and salt to the sponge. Using a dough hook or sturdy spoon, mix until the dough comes together and pulls away from the bowl sides, about 3 minutes. If the dough is too wet, add more flour 1 Tablespoon at a time, until soft and a bit sticky but manageable.
- Knead the Dough: Knead in the mixer for 8–10 minutes or by hand on a lightly floured surface for the same time. The dough should be soft and slightly tacky. If it becomes too sticky, add more flour 1 Tablespoon at a time but avoid excess flour to prevent dry dough. After kneading, poke the dough—if it slowly bounces back, it’s ready for the first rise.
- 1st Rise: Lightly grease a large bowl, place the dough inside, and turn to coat. Cover and allow the dough to rise in a warm area for 1.5–2 hours, or until doubled in size.
- Shape the Dough: Grease a 9×5-inch loaf pan. Punch down the risen dough, then lightly flour your work surface, hands, and rolling pin. Roll the dough into a large rectangle (about 8×15 inches), then roll it up into an 8-inch log and place in the prepared loaf pan.
- 2nd Rise: Cover the shaped loaf and let it rise until it’s about 1 inch above the pan’s rim, approximately 45–60 minutes.
- Preheat Oven and Optional Topping: Adjust the oven rack to a lower position and preheat to 350°F (177°C). For the oat topping, brush the risen loaf with egg white and sprinkle with oats.
- Bake the Bread: Bake for 36–40 minutes, or until golden brown on top and hollow-sounding when tapped. If browning too quickly, tent with foil around the 20-minute mark. An instant-read thermometer should read 195–200°F (90–93°C) at the center when finished.
- Cool and Store: Let the bread cool for a few minutes in the pan on a wire rack, then remove from the pan and allow to cool completely before slicing if desired. Tightly cover leftovers and store at room temperature for up to 1 week.
Notes
- Freezing Instructions: After shaping and placing the dough in the loaf pan, cover and freeze up to 3 months. Thaw and let rise at room temperature 4–5 hours before baking. You can also freeze the baked bread for up to 3 months and thaw before serving.
- Overnight Instructions: After shaping, refrigerate the covered loaf for up to 15 hours. Bring to room temperature and rise for 1–2 hours before baking. Alternatively, you can refrigerate the dough after the first knead and allow a full rise after removing from the fridge.
- Milk Options: Low-fat or nondairy milk work, but whole milk gives best texture.
- Yeast Options: Both instant and active dry yeast may be used; rise times may vary slightly.
- Flour Freshness: Ensure your whole wheat flour is fresh; old flour can make bread taste bitter.
- Swapping Flour: Swap up to 1 cup (130g) of whole wheat for bread flour if a fluffier loaf is desired.
- Honey Substitute: You may use granulated or brown sugar if needed, but honey provides the best flavor.
- Shaping: This dough must be baked in a loaf pan and is not suitable for a boule shape.
- Doubling: For best results, prepare two separate batches rather than doubling in one bowl.
- Prep Time: 4 hours, 30 minutes
- Cook Time: 38 minutes
- Category: Bread
- Method: Baking
- Cuisine: American
Nutrition
- Serving Size: 1 slice (out of 12)
- Calories: 160
- Sugar: 4g
- Sodium: 210mg
- Fat: 3g
- Saturated Fat: 2g
- Unsaturated Fat: 1g
- Trans Fat: 0g
- Carbohydrates: 28g
- Fiber: 3g
- Protein: 5g
- Cholesterol: 10mg

