If you’ve ever dreamed of pulling steaming, golden bread out of your own oven, this Rosemary Garlic Focaccia Recipe is about to become your new obsession. With an irresistibly pillowy crumb, a crispy olive oil–kissed crust, and the savory perfume of fresh rosemary and garlic, this Italian classic is pure joy in every bite. The best part? It’s surprisingly simple even for beginners. Trust me, once you try making this focaccia at home, you’ll want to bake it for every gathering, family dinner, or just because—it’s that wonderful.
Ingredients You’ll Need
Let’s take a moment to appreciate how each ingredient in this Rosemary Garlic Focaccia Recipe plays a starring role. We’re keeping it straightforward, but every element brings something important—whether it’s texture, aroma, or a pop of color. Here’s what you’ll need:
- All-purpose flour (maida): The main structure of your bread, giving it that classic chewy, airy Italian texture.
- Instant yeast: The magic behind the rise—make sure it’s fresh for best results!
- White granulated sugar: Just a spoonful helps wake up the yeast and gives the bread a subtle hint of sweetness.
- Salt: Critical for flavor, it balances the richness of the olive oil and savory toppings.
- Extra virgin olive oil: The heart and soul of this focaccia, giving it flavor, aroma, and a gorgeous golden crust.
- Lukewarm water: The key to dissolving sugar and activating yeast—be sure it’s just warm, not hot.
- Sliced cherry tomatoes (topping): These burst with juicy sweetness and add a cheerful, rustic touch.
- Fresh rosemary (topping): This herb is what makes focaccia sing—it’s aromatic and earthy.
- Crushed garlic (topping): For that deep, savory kick that mingles with the rosemary beautifully.
How to Make Rosemary Garlic Focaccia Recipe
Step 1: Activate Your Yeast
Start by combining sugar and water in a small saucepan. Give the water a gentle heat—just enough to completely dissolve the sugar, not to make it hot. Once you’ve got warm, sweet water, add your instant yeast and stir well to dissolve. Let it sit for about 10 minutes. You’re looking for foam on top as a sign of lively, healthy yeast. No foam? Let it sit a bit longer or double-check the age of your yeast. This is the foundation of a gorgeous rise.
Step 2: Prepare the Dough
Pour your flour and salt into a large mixing bowl, then make a little well in the center. Gradually pour in that foamy yeast mixture, mixing as you go. What you want is a sticky dough—it feels messy at first, but fight the urge to add more flour! After it has come together, drizzle in your olive oil and knead the dough for about 3 to 5 minutes. As you knead, it’ll become glossier and less sticky. If using a stand mixer, just set it on high for a couple of minutes. Remember, focaccia isn’t fussy about kneading.
Step 3: Proof the Dough
Trickle a little olive oil into a clean bowl and swirl it around so nothing sticks. Drop in your dough, then cover tightly with a lid or plastic wrap. Find a cozy, warm spot—an unheated oven or even your microwave works—and let it rest for at least 30 minutes. When it’s doubled in size, you’re ready for the next step. If it needs a bit longer, that’s totally fine; just keep an eye on the volume.
Step 4: Second Proofing and Shaping
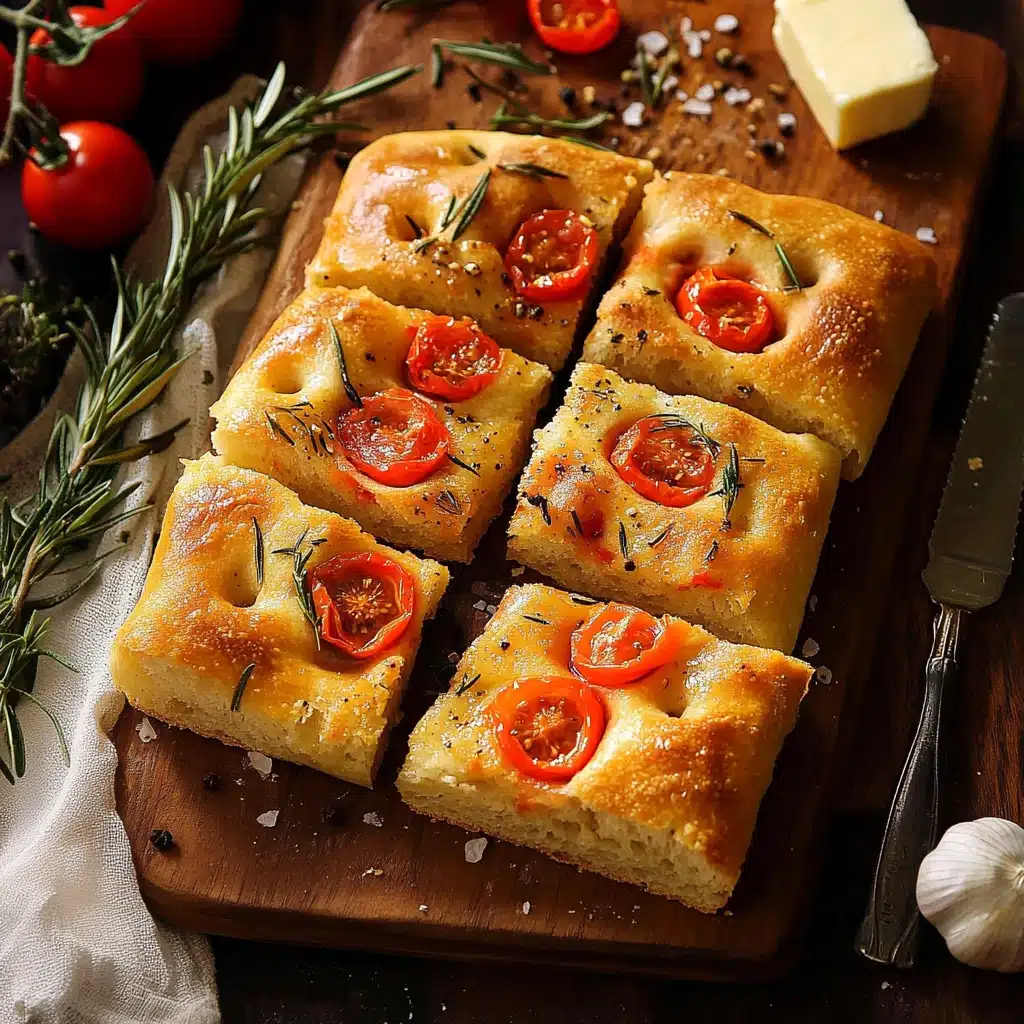
Gently tip your risen dough onto a greased countertop. Give it another gentle knead for a minute or two—just to punch down any big air bubbles. Grease your baking tray or tin with a bit of olive oil, then place the dough on top. Use your fingertips (dip them in oil if it sticks) to stretch and press the dough out flat to about half an inch thick. Now for the fun part: poke dimples all over the surface, then nestle slices of cherry tomato and rosemary sprigs into each. Drizzle more olive oil and sprinkle with crushed garlic. Let it rest again for 20 to 30 minutes while the oven heats up.
Step 5: Bake to Golden Perfection
Preheat your oven to 200 degrees Celsius (around 390 degrees Fahrenheit) and give it a good 10 minutes to get nice and hot. Slide your focaccia into the middle rack and bake for about 40 minutes. Watch as it turns beautifully golden and your whole kitchen fills with the smell of garlic and herbs. When it’s done, take it out and cool slightly on a wire rack. For a final flourish, brush a little more olive oil across the top for that irresistible shine. Cut into generous squares—and enjoy the fruits (and scents) of your labor!
How to Serve Rosemary Garlic Focaccia Recipe
Garnishes
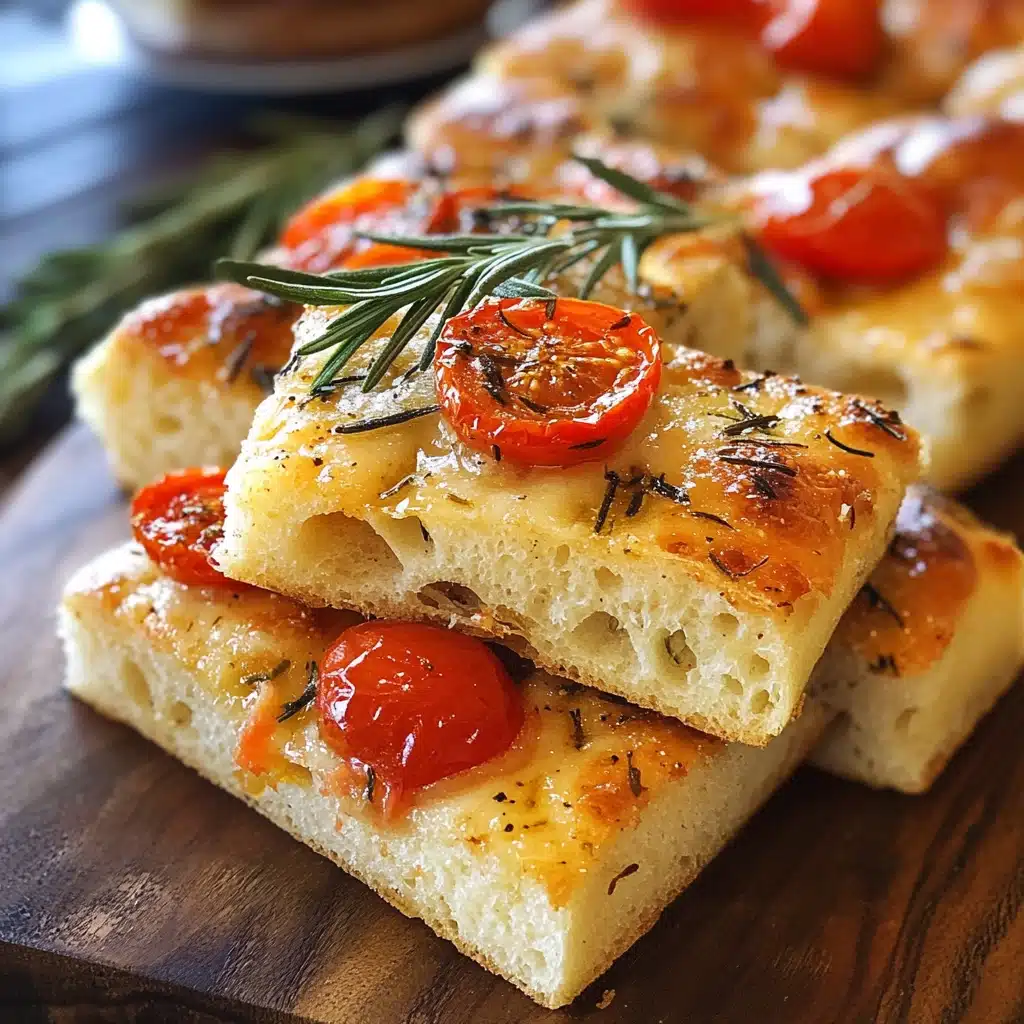
Once your Rosemary Garlic Focaccia Recipe emerges warm from the oven, take it up another notch by finishing with a shower of flaky sea salt and a few extra rosemary leaves. If you have some high-quality olive oil, a little drizzle just before serving adds a lovely sheen and amps up that Mediterranean aroma. You can also scatter some grated parmesan or cracked black pepper for a savory boost.
Side Dishes
Rosemary Garlic Focaccia Recipe loves company—serve it as the ultimate starter with a small bowl of extra virgin olive oil and balsamic vinegar for dipping. It’s a perfect partner to a fresh caprese salad, warm bowls of soup, or even as the base for a dreamy Italian-style sandwich filled with mozzarella, tomatoes, and basil. Don’t be surprised if your guests keep reaching for “just one more slice.”
Creative Ways to Present
For a festive presentation, cut your focaccia into fun shapes using cookie cutters, or create individual mini focaccias for each guest. Try mixing up the toppings—think thinly sliced red onions, roasted bell peppers, or kalamata olives alongside the classic rosemary garlic combo. You can even slice focaccia in half lengthwise, then layer on spreads and fillings for a show-stopping sandwich centerpiece at your next gathering.
Make Ahead and Storage
Storing Leftovers
If you have any leftovers of your Rosemary Garlic Focaccia Recipe (honestly, this is rare!), keep them in an airtight container at room temperature for up to two days. The focaccia stays soft and flavorful, but you can always pop it in the oven or toaster for a quick refresh.
Freezing
To freeze, wrap individual slices or the whole slab tightly in plastic wrap and then place in a freezer-safe bag or container. Rosemary Garlic Focaccia Recipe freezes beautifully for up to two months. Thaw at room temperature or for a few hours in the fridge before reheating.
Reheating
Bring your focaccia back to life by warming it in the oven at 180 degrees Celsius (about 350 F) for 5 to 10 minutes. This crisps up the edges and revives the aromatic topping. You can also use a toaster oven for smaller portions—just don’t microwave, as it can make the bread chewy.
FAQs
Can I make the Rosemary Garlic Focaccia Recipe with whole wheat flour?
You can substitute up to half of the all-purpose flour with whole wheat flour to add a rustic, nutty flavor. Just keep in mind that the texture will be a bit denser, but still delicious.
What if my dough isn’t rising?
Check that your water wasn’t too hot (which can kill the yeast) and verify the yeast is fresh and not expired. Try moving the dough to a warmer spot, or let it proof longer. Sometimes colder kitchens just need a bit more time or gentle warmth.
Can I add cheese to this Rosemary Garlic Focaccia Recipe?
Absolutely! Sprinkle grated parmesan, mozzarella, or pecorino over the focaccia a few minutes before it finishes baking. The cheese will melt and bubble, adding even more flavor to each bite.
How do I know when my focaccia is fully baked?
The top should be golden brown and the sides slightly pulling away from the pan. If you tap the bottom of the bread, it should sound hollow. Let it cool for a few minutes before slicing for the best texture.
Is it possible to make this focaccia gluten-free?
Yes, you can use a gluten-free all-purpose flour blend and adjust the water if needed until the dough comes together. The texture will be somewhat different but still tasty and satisfying.
Final Thoughts
I truly hope you give this Rosemary Garlic Focaccia Recipe a try—you’ll love how the simple steps transform into a golden, fragrant bread that’s perfect for sharing. Whether you bake it for a special occasion or as a new family tradition, nothing beats the taste (and aroma!) of fresh, homemade focaccia. Happy baking, friend!
Print
Rosemary Garlic Focaccia Recipe
- Total Time: 1 hour 35 minutes
- Yield: 8 slices
- Diet: Vegetarian
Description
Rosemary Garlic Focaccia is an easy, aromatic Italian bread that’s perfect for beginner bakers. Featuring a fluffy, olive oil-rich crumb topped with fresh rosemary, garlic, and juicy cherry tomatoes, this bread is ideal for serving as a side dish, appetizer, or for snacking. With minimal kneading and simple ingredients, it’s an impressive homemade bake that anyone can master.
Ingredients
For the Dough
- 500 grams all-purpose flour (maida)
- 10 grams (1 tablespoon) instant yeast
- 10 grams (1 tablespoon) white granulated sugar
- 1 tablespoon salt
- 2 tablespoons (30 ml) extra virgin olive oil
- 350 ml (approx 1⅓ cups) lukewarm water
For the Topping
- 1 cup sliced cherry tomatoes
- 1 tablespoon fresh rosemary
- 1 tablespoon crushed garlic
- 2 tablespoons extra virgin olive oil
Instructions
- Activate Yeast: Combine sugar and water in a small saucepan. Bring to a boil just until the sugar fully dissolves, then let the water cool to lukewarm (it should feel warm but not hot to the touch). Stir in the instant dry yeast, mix well, and let it sit for 10 minutes until foamy. This means your yeast is activated and ready to use.
- Prepare Dough: Add the flour and salt to a mixing bowl or stand mixer. Gradually pour in the activated yeast mixture, stirring to form a sticky dough. Don’t worry if it seems very sticky—don’t add more flour. Drizzle in the olive oil and knead by hand for 3–5 minutes (or in a stand mixer for 2–3 minutes) until the dough becomes smooth and less sticky.
- First Proof: Grease a large bowl with olive oil and transfer the dough to it. Cover the bowl tightly and let it rise in a warm place (such as an oven or microwave) for 30 minutes, or until doubled in volume. If it hasn’t doubled after 30 minutes, let it proof for up to an hour.
- Shape and Second Proof: Turn the dough onto a lightly greased surface and gently knead to release air for about 3–5 minutes. Line or grease a baking tray or tin with olive oil, then press the dough into a rectangle about ½ inch thick. Use your fingertips to create dimples all over the dough. Press cherry tomato slices and rosemary sprigs into the dimples, drizzle with olive oil, and sprinkle with crushed garlic. Let the dough rise again in a warm spot for 20–30 minutes, until puffed.
- Bake: Preheat the oven to 200°C (392°F) for 10 minutes. Bake the focaccia on the middle rack for 40 minutes, until golden brown and crisp on top. Transfer to a wire rack, brush with more olive oil, and let cool slightly.
- Serve: Slice into squares and enjoy warm or at room temperature, either plain or with your favorite dips and spreads.
Notes
- Ensure sugar is fully dissolved in the water before adding yeast.
- Water should be just lukewarm—not hot—to prevent killing the yeast.
- Wait for a foamy layer to form when activating yeast; this confirms it’s alive.
- Check the expiration date on your yeast to ensure best results.
- If dough feels sticky, avoid adding extra flour; a well-hydrated dough yields a softer bread.
- Proof dough in a warm, draft-free place for optimal rising.
- Baking times may vary based on oven size; check for a golden crust as your cue.
- Customize toppings as desired; olives, onions, or peppers work well too.
- Prep Time: 15 minutes
- Cook Time: 20 minutes
- Category: Side-dishes
- Method: Baking
- Cuisine: Italian
Nutrition
- Serving Size: 1 slice
- Calories: 308
- Sugar: 3g
- Sodium: 879mg
- Fat: 8g
- Saturated Fat: 1g
- Unsaturated Fat: 6g
- Trans Fat: 0g
- Carbohydrates: 51g
- Fiber: 2g
- Protein: 7g
- Cholesterol: 0mg

